You’ll Want to Try These Cheese and Onion Knishes Tonight


Cheese and onion knishes made with simple pantry ingredients, slowly cooked onions, and soft cheese wrapped in golden dough that disappears faster than expected. This is my attempt to make a speedy version of classic Jewish knishes, and I think it’s even better than the original (at a fraction of the time).

Jump to:
Knishes sit quietly on a tray. Soft edges, folded by hand, nothing polished about them. I set them down and step back for a moment. People look, then reach for something else first. It happens often.
Then one knish is gone. Then another. Soon there are only a few left, and I start counting without meaning to.

I keep onions in the pantry all the time. Eggs too. They stay through every kind of week, pushed to the side and then pulled forward again when I need something that will hold a meal together. My grandmother cooked this way. My mother did too. I realize you didn’t plan around what stood out. You built around what stayed.
A knish, or knysh, comes from Eastern European kitchens, from Ukrainian and Ashkenazi Jewish cooking where dough wrapped around whatever could stretch across a table. Potato, kasha, or cheese. Fillings that felt steady, shaped by what was available that day.
I saw the onions in the pantry first. And a container of farmer’s cheese in the fridge, slightly pushed to the back. Crescent dough waited in the back. I sliced the onions and let them cook slowly until they softened and deepened in color, filling the kitchen with a steady smell that kept me near the stove.
With the same sizzle and melt. I remember the cheese bourekas that break apart at the edges. The cheese shakshuka that stays in the center of the table while everyone leans in. Even the fried cheese curds that disappear faster than I can set them down.

When the onions cooled, I mixed them into the cheese and tasted it standing at the counter. It felt complete. The dough came next. Folding, sealing, placing each one on the tray.
By the time I took them out, golden on top, slightly different from one another, I didn’t say anything. I set the tray down.
That same pause happened again. Then one disappeared.
And now, I make these speedy knishes when guests come over for Shavuot every year. I don’t even need to claim it’s just because they’re fast. They taste amazing, too.
Ingredients

Farmer’s Cheese or tvorog gives this cheese and onion knishes recipe its structure. It stays soft while baking without turning runny, which keeps the filling in place when you fold the dough. If you can’t find it, well-drained ricotta works, though it will feel lighter and slightly wetter. A mix of ricotta and a bit of cream cheese brings it closer in texture. Cottage cheese can work in a pinch if blended smooth and drained well.
Onions carry the depth of the filling. As they cook down, they turn soft and slightly sweet, which balances the tang of the cheese. Yellow onions are my usual choice for their balance, though white onions work if that’s what you have. Red onions can be used, though they bring a sharper edge and a darker color.
My secret ingredient here is Refrigerated Crescent Roll Dough. It’s not an ingredient I turn to often, but in a pinch, it solved my hosting appetizer problems. This dough keeps the process manageable without losing the spirit of a traditional knish. It bakes into a soft, golden shell that holds the filling well. If you prefer a more classic version, a simple homemade dough or even store-bought puff pastry can be used. Puff pastry will give a flakier result, while traditional dough will feel denser and closer to old-style knishes.
See the recipe card for full list and exact quantities.
How to Make Cheese and Onion Knishes Recipe

These delicious cheese and onion knishes come together in a way that depends on paying attention to small details. The onions, the texture of the filling, and how the dough is sealed all shape the final result. Each step builds on the last, so it helps to notice how things look and feel as you go:
Cook the Onions Until Deeply Golden

- At first, they will look bulky and pale. After a few minutes, they begin to soften and release moisture. Keep stirring often so they cook evenly and don’t catch on the bottom of the pan.
- If the onions brown too quickly in spots, the heat is too high. Lower it and give them more time.
- Once done, transfer them to cool completely. Warm onions will loosen the cheese too much and make the filling harder to work with.
Mix the Filling Until Thick and Cohesive


- The mixture should feel thick and hold its shape when scooped. It shouldn’t spread or look watery.
- If it feels loose, let it sit for a few minutes to firm up. If the onions were still warm, you may notice the cheese softening too much. In that case, give it time to cool further before shaping.
Prepare the Dough Carefully


- The dough should feel soft and slightly stretchy, though it can tear if pulled too hard.
- If it sticks to your hands or the surface, lightly flouring your fingers can help. Try to handle it gently so it stays intact.
Fill and Seal with Attention to the Edges


- If the dough pulls apart, press it back together and smooth it with your fingers. The sealed knish should feel compact and secure, not loose.
Arrange and Brush for Even Baking


- This helps keep them closed as they bake. Leave a bit of space between each one so the edges can cook evenly.
- Use a light, even layer so it coats without pooling. Too much egg can drip down the sides and bake unevenly.
Bake Until Golden and Set

- The color should deepen gradually, with slightly darker edges.
- If the tops brown too fast while the bottoms stay pale, move the tray to a lower rack. The knishes are ready when they feel set to the touch and hold their shape when lifted.
Let Them Rest Before Serving

- The filling settles during this time, making them easier to handle.
- Serve warm or at room temperature. When you break one open, the filling should stay in place, soft but not runny, with the onions fully blended into the cheese.
Storage

Let the cheese and onion knishes cool completely before storing. Place them in an airtight container and refrigerate for up to 3 days. The filling stays stable, though the dough softens slightly over time. Reheat in the oven at a moderate temperature until warmed through to bring back some texture on the outside. The microwave works for a quick option, though the crust will be softer.

These knishes freeze well after baking. Once fully cooled, arrange them in a single layer until frozen, then transfer to a sealed container or freezer bag. Store for up to 1 month. Reheat straight from frozen in the oven until heated through. This helps the dough regain its structure better than thawing first.
Top Tips
Drain your cheese if there’s any doubt – even farmer’s cheese can vary. If it looks wet or leaves liquid in the container, give it a quick drain through a sieve or cheesecloth. I skipped this once and the filling spread inside the dough, making sealing harder and the centers too soft after baking.
Cool the onions completely before mixing – it’s tempting to rush this step. Warm onions melt into the cheese and change the texture of the filling right away. I spread them on a plate and leave them near an open window. The filling becomes easier to portion and holds its shape better when fully cooled.
Don’t overfill, even if it feels like you should – it’s easy to add more filling than the dough can handle. I’ve done it thinking it would make them more generous. It leads to seams opening in the oven and filling leaking out onto the tray. Keep the portion modest so each knish stays sealed and bakes evenly.
Recipe
Tried and loved this recipe? Please leave a 5-star review below! Your reviews mean a lot to me, so if you’ve got any questions, please let me know in a comment.

Cheese and Onion Knishes
Simple cheese and onion knishes with caramelized onions and a soft, structured filling.
Prevent your screen from going to sleep
Ingredients
- 2 tubes 8 oz each refrigerated crescent roll dough
- 2 cups farmer’s cheese
- 3 large onions sliced
- 3 tablespoon vegetable oil
- 1 teaspoon salt
- ½ teaspoon black pepper
- 1 egg beaten (for brushing)
Instructions
-
Heat oil in large pan. Cook onions over medium heat 20 minutes, stirring often, until golden brown. Cool completely.
-
Mix farmer’s cheese, cooked onions, salt, and pepper.
-
Unroll crescent dough and separate into 8 pieces.
-
Place 2 tablespoons filling in center of each piece. Bring corners together and pinch to seal.
-
Place seam-side down on greased baking sheet. Brush tops with beaten egg.
-
Bake at 375°F for 15-20 minutes until golden brown.
-
Serve warm or at room temperature.
Nutrition
Calories: 131kcalCarbohydrates: 5gProtein: 14gFat: 6gSaturated Fat: 3gPolyunsaturated Fat: 0.3gMonounsaturated Fat: 0.2gTrans Fat: 0.003gCholesterol: 110mgSodium: 550mgPotassium: 143mgFiber: 1gSugar: 2gVitamin A: 41IUVitamin C: 4mgCalcium: 23mgIron: 0.4mg
Large skillet or sauté pan
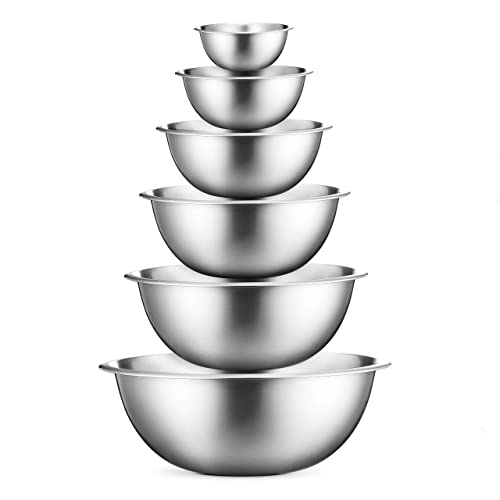
Parchment paper or light greasing oil

Post Comment