The Technique Behind Perfect Vegan Sandwich Loaf


Texture first, everything else second. This vegan sandwich loaf came out of tangzhong testing and a post-holiday recalibration.

Jump to:
After the holidays, my group chat always shifts tone. The jokes slow down. Photos of half-cut pies sit next to messages about tight waistbands. Someone asks whether sandwich bread can still feel light if it is baked at home.
That was the week a friend sent a picture of a loaf that looked almost unreal in its softness and typed a single word underneath it: tangzhong.

I had baked bread long enough to know when something real was happening. Tangzhong shows up in many Asian baking traditions, and once you learn it, you begin to see it everywhere. It changes how a bread recipe behaves, especially in doughs that tend to dry out.
Back in my hometown where I learned to bake early on, softer breads were often tied to careful hydration and patience. My mom’s prized crumb that stayed gentle for days, especially for school sandwiches wrapped in paper and tucked into bags. Tangzhong felt like a bridge between those instincts and a technique I had somehow missed.
That week our kitchen shifted gears. After weeks of heavy, rich food, I wanted bread that felt calm on the table. Something for morning toast, soup nights, and the endless requests from the kids for another slice.

I cooked flour and almond milk into a paste until the spoon left lines behind, then mixed it into vegan dough again and again. I paid attention to how long the paste stayed spreadable, which plant milk kept the loaf soft without weight, and how far the dough could be kneaded before it pushed back.
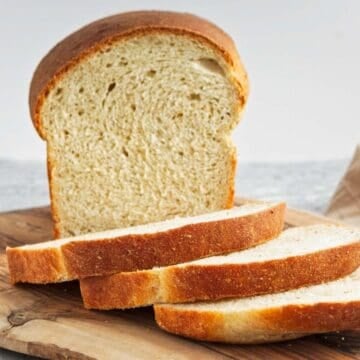
This loaf came out of that stretch of testing and overthinking. It slices cleanly. Holds peanut butter for kids and grilled vegetables for me. And it belongs next to a bowl of soup or under something bold like the filling from my southern-style vegan pulled pork sandwich, where vegan sandwich bread needs to stay fluffy without collapsing.. On other days, it sits alongside a pot of beans and a slice of vegan rosemary sourdough bread for contrast. Bread conversations always lead elsewhere too, sometimes to dessert, like the vegan hubbard squash pie that waits for colder evenings.
Somewhere between batches, I realized I wasn’t chasing lighter food as much as I was chasing the right texture. Bread that bends, holds, and supports whatever you put on it. A loaf of bread shaped in a familiar loaf pan, built without bread flour, and meant to earn its place in everyday comfort meals
Ingredients

- Tangzhong– Tangzhong is just flour and non dairy milk. Cooking a small portion of flour with liquid pre-gelatinizes the starches, which helps the bread retain moisture and stay soft for days. I use almond milk because it keeps the crumb light and neutral. Oat milk works well too and gives a slightly fuller crumb. Avoid very high-fat canned coconut milk here, which can weigh the dough down.
- Instant yeast – This gives reliable lift and a clean rise, especially important when working with enriched vegan doughs. I have tested this loaf with active dry yeast, but the rise is slower and less predictable unless you bloom it first. For consistency, instant yeast has been the most dependable in my kitchen.
- Almond milk – The second addition of non-dairy milk softens the crumb and supports even fermentation. Using the same milk for both the tangzhong and the dough keeps hydration consistent. Soy milk performs well structurally but shifts the flavor, while rice milk tends to be too thin and can dry the loaf more quickly.
See the recipe card for full list and exact quantities.
How to Make this Homemade Vegan Bread Recipe

The best bread stays soft because every step supports moisture and structure, starting with the tangzhong. Vegan bread can dry quickly or rise unevenly, so paying attention to texture at each stage leads to the best results. Here’s how to make this bread:
Make the Tangzhong


- You are looking for a paste that resembles loose mashed potatoes or pudding. When you drag the spoon through, it should leave visible trails that do not immediately fill in.
- If it stays runny, it has not cooked long enough. If it turns stiff and gluey, it went too far. Remove it as soon as it reaches that smooth, spreadable stage.
Bring the Dough Base Together

- This step is about temperature. Touch the mixture with your finger. It should feel close to body temperature, not hot. If it is too warm, the yeast will struggle later. If needed, give it a few minutes before moving on. The mixture does not need to be perfectly smooth, small streaks are fine.
Build the Dough


- At this point, the dough will look rough and uneven, with dry patches and sticky spots. That’s expected. Once you add the oil and salt and work it in, the dough should start coming together into something cohesive, though still slightly tacky.
Knead Until Elastic

- A well-kneaded dough stretches without tearing and springs back slowly when pressed. If it keeps tearing, it needs more time. If it feels dry and stiff, you may have added too much flour.
First Rise


- Press a finger gently into the surface. If the indentation fills back slowly, it is ready. If it snaps back immediately, it needs more time. A cool kitchen means patience here.
Shape the Loaf


- Loose rolling creates gaps inside the loaf. Place it seam side down in the pan and tuck the ends underneath so it rises evenly.
Final Rise Before Baking


- If it barely reaches the rim, the loaf will be dense. If it rises far beyond, it may collapse in the oven.
Bake Until Deeply Golden

- Pale bread usually means it needed more time. If it browns too quickly, your oven may run hot.
Cool Before Slicing

- Let the loaf cool in the pan briefly, then transfer it to a rack. The crumb continues to set as it cools. Cutting too early compresses the interior and makes the bread feel gummy, even if it baked correctly.
Storage

Once fully cooled, keep the vegan sandwich loaf at room temperature in a bread box or sealed bag for up to three days. A low-humidity spot is best, as excess moisture can soften the crust and make the crumb feel damp.
For longer storage, refrigerate the loaf in a tightly sealed container or bag for up to one week. The crumb will firm slightly in the cold but softens again when toasted or brought back to room temperature.

This loaf also freezes well. Slice it first so you can remove only what you need, then wrap tightly and freeze for up to two months. Thaw slices at room temperature or warm them directly in a toaster. Avoid microwaving, which can make the crumb rubbery rather than soft.
Top Tips
Tangzhong texture matters more than timing – after comparing notes with other bakers, I learned to ignore the clock and watch the paste instead. I stop cooking the tangzhong the moment it holds clean lines and looks glossy. Rushing this step led to faster staling, while overcooking reduced stretch. The right texture keeps the loaf soft.
Vegan dough needs a softer touch than instinct suggests – Several bakers warned me that vegan sandwich dough often feels underworked when it is actually ready. I stopped adding flour out of habit and let the dough stay slightly tacky. That change alone improved the crumb and made cleaner slices.
Recipe
Tried and loved this recipe? Please leave a 5-star review below! Your reviews mean a lot to me, so if you’ve got any questions, please let me know in a comment.
Vegan Sandwich Loaf
Vegan sandwich loaf with tangzhong for controlled softness and clean slicing
Prevent your screen from going to sleep
Ingredients
Tangzhong
- ¼ cup all-purpose flour 60ml
- ⅔ cup almond milk, or other non-dairy milk 160ml
Main Dough
- 3 cups all-purpose flour 360g
- ½ cup whole wheat flour 65g
- 2¼ teaspoon instant yeast 7g
- ¾ cup almond milk, or other non-dairy milk 180ml
- 1 tablespoon granulated sugar 12g
- 1 teaspoon sea salt 6g
- 2 tablespoon vegetable oil 30ml
Instructions
Start the dough
-
In a large bowl, stir the tangzhong with the remaining almond milk until mostly smooth. Touch the mixture. It should feel warm, close to body temperature, not hot.
Add dry ingredients
-
Stir in the all-purpose flour, whole wheat flour, sugar, and instant yeast. It will look rough and shaggy at first.
First rise
-
Place in a lightly oiled bowl, cover, and let rise until doubled. The surface should look puffed and relaxed.
Nutrition
Calories: 1817kcalCarbohydrates: 376gProtein: 61gFat: 8gSaturated Fat: 1gPolyunsaturated Fat: 2gMonounsaturated Fat: 2gSodium: 2349mgPotassium: 911mgFiber: 25gSugar: 13gVitamin A: 5IUVitamin C: 0.1mgCalcium: 91mgIron: 22mg


Measuring Cups and Spoons


Post Comment